Wildlife
Do not disturb: Practicing ethical wildlife photography
Wildlife photographers on the thrill of the chase — and the importance of setting ethical guidelines
- 2849 words
- 12 minutes
This article is over 5 years old and may contain outdated information.
People & Culture
This photog lives in southern Ontario, but still gets amazing photos of the northern lights. Here’s how.
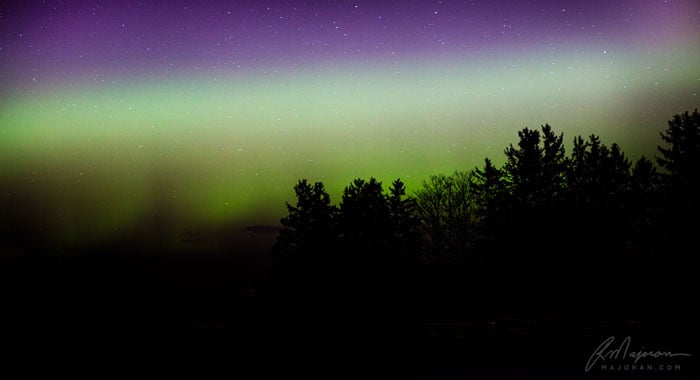
Ray Majoran is a photographer, and member of the CG Photo Club. He lives in southwestern Ontario with his wife Carolyn and daughter Adalai. You can see more of his work by following him on 500px, visiting his portfolio, checking out his and Carolyn’s website, or following him on Twitter. A longer version of this article originally appeared here, and is being republished with permission.
As an avid photographer who loves shooting the aurora borealis (more commonly known in the northern hemisphere as the northern lights), I sometimes get asked for tips. Being in southwestern Ontario, I don’t have the advantage that many high-latitude sky watchers have, so when the northern lights are out, I want to make the most of it! Here’s a summary of everything I’ve learned since I started shooting them back in 2001.

THE BEST TIME TO SEE THEM
As solar wind hits Earth, northern lights are formed. Northern lights are always occurring, but depending on location, daylight, cloudiness, moonlight conditions, etc., you might not actually see them. Midnight is usually the best time to see them, but that’s not always the case. Here are two factors that can affect when the northern lights get brighter:
INCREASE YOUR ODDS OF SEEING THE LIGHTS
Photographers don’t just end up being in the middle of nowhere in the wee hours of the night. Here are five essential tools that I use to determine when the northern lights are going to hit.
One huge caveat to all of this is weather and moonlight conditions. If it’s completely overcast outside, ignore all of your alerts—you won’t be able to see the northern lights. Additionally, if you find yourself in a lunar cycle where the moon is full (or close to it), viewing the lights may be severely obstructed.

WHERE TO GO
Simply put, go where it’s dark. When I receive an alert (and I’m not sound asleep), I drive as far away from the city as I can. For high-latitude residents, this isn’t as much of an issue as sometimes the lights can literally be on top of you, but for people like me (who live further south), you’ll want to get as remote as possible. Generally speaking, look north, but that’s not always the case. Solar wind can fluctuate at the drop of a dime so pay attention to east, west and right above you.
One tip that’s often overlooked: try and pick an interesting spot beforehand. Drive around during daylight hours and look for interesting trees, farmhouses, etc. that would make a good foreground for the lights. If you’re thinking about walking into a field, make a visual note of obstacles, holes, etc. Then, go back at night (on a non-northern lights night) to see if your intuitions were correct (i.e. there is no major light pollution, no angry barking farm dogs, etc.). Pictures with good foreground subjects (i.e. buildings, trees, water reflections, mountains, very still people, etc.) are always more interesting than shooting into a flat field.

HOW TO SHOOT THEM
Every person’s gear is going to be different, but there are some common tips that I believe can prove valuable to everyone:?

Shoot as low an ISO as possible (ideally 100 — 400 ISO)
Shoot as low an aperture as possible (ideally f/2.8 — f/4.0)
Keep your shutter speed between 6-12 seconds.
You will have to adjust according to light conditions. If the auroras are brighter, you will be able to get away with a lower ISO. If they are weaker, you may have to increase your ISO to 800. In my experience, anything higher than 800 and you’re going to start getting “fake stars” due to camera sensor noise, especially if you end up printing a larger version of the photo. The lower the shutter speed, the more you are going to see the lights dance in your photos (i.e. 8 second exposure). The higher the shutter speed, you will see more of a northern lights blur (i.e. 15-30 seconds). Note: Sometimes the blur effect can be cool as well and is the only viable option in a weakened geomagnetic storm. The following image is a good example of that.
If the lights were powerful, I’d aim for the following settings:
100 – 400 ISO
6-8 second exposure
f/2.8 – 4.0If the lights were weak, I’d aim for the following settings:
400 – 800 ISO
8-16 second exposure
f/2.8 – 4.0
If your lens isn’t capable of shooting as low as f/2.8, you may have to increase your ISO or exposure time to compensate for light.
Another thing you’ll want to consider is what format to shoot in. Personally, I like to shoot in RAW format so that I can process the photos later. Others prefer to shoot in JPEG format, which essentially means that your camera processes the photo for you. RAW format files give you more flexibility with tones, shadows, exposure, white balance, etc.?As far as camera bodies go, let me just say this: As it relates to shooting northern lights, your lens is far more important than your camera body. A low-priced Canon EOS Rebel or Nikon D3300 will take a phenomenal northern lights photo with the right lens and settings. My personal setup when shooting the northern lights is as follows:
Camera: Canon 5D Mark III
Lens 1: Canon 24-70 f/2.8 USM
Lens 2: Canon 14mm f/2.8 USM II
Tripod: Manfrotto 496RC2
Wireless Remote Shutter Release: Vello Wireless Shutterboss
Wildlife
Wildlife photographers on the thrill of the chase — and the importance of setting ethical guidelines
People & Culture
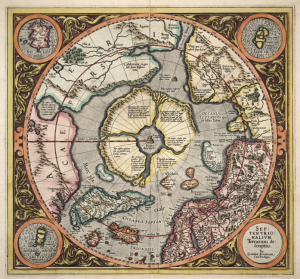
In this essay, noted geologist and geophysicist Fred Roots explores the significance of the symbolic point at the top of the world. He submitted it to Canadian Geographic just before his death in October 2016 at age 93.

People & Culture
Captain Cook Rediscovered: Voyaging to the Icy Latitudes seeks to provide a fresh view on Cook's legacy from a North American perspective.
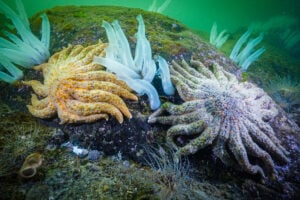
Wildlife
After a decade of carnage, we finally know what’s devastating sea stars along North America’s West Coast. Does that mean scientists can save them?